RAID OPTIMIZERFree RAID guide

Overview

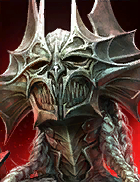
Deathknight is a Common Magic HP champion from the Undead Hordes, built as a crowd control. In battle the kit places [Sleep].

Crowd control

Where Deathknight helps

Worked out from the kit: each area lists what helps there (from our mode guides), and these are the matches in this champion's skills. Not a hand-made rating - gear, speed and the team matter more.

AreaFitBecause the kit has
Sand Devil's Necropolis
Dungeons
Good fit
Faction Wars
Core
Can help

Skills

1/10

Book value

Low priority - books mostly add damage. 7 skill books to max every skill; each book upgrades a random skill.

  • A1 Decrepit Hatchet: effect chance 15% → 35%
  • +25% damage / healing in total across the skills
A1

Decrepit Hatchet

Attacks 1 enemy. Has a 15% chance of placing a [Sleep] debuff for 1 turn.
Damage 5.5×ATK
Skill books (7)
  1. Level 2: Damage +5%
  2. Level 3: Buff/Debuff Chance +5%
  3. Level 4: Damage +5%
  4. Level 5: Buff/Debuff Chance +5%
  5. Level 6: Damage +5%
  6. Level 7: Buff/Debuff Chance +10%
  7. Level 8: Damage +10%
Passive

Payback [P]

Has a 30% chance of counterattacking when hit.

Skill texts, cooldowns and book upgrades are the game's own. "Damage" is the skill's multiplier (for example 4×ATK = four times this champion's ATK, before the target's DEF) - see how damage works.

Suggested build

A starting point worked out from Deathknight's own skills - not a hand-tested build. Each line says why it was picked; your gear and team decide the rest. See what stats each champion needs.

PvE

Stat priority

  1. HP% - Bigger HP pool to soak hits for the team.
  2. DEF% - Every point of DEF cuts the damage taken.
  3. SPD - Protection, taunts and buffs only help if they come in time.
  4. RES - Shrugs off enemy debuffs.
  5. ACC - Optional - only the A1 places [Sleep], so other stats come first.

Gear set combinations

Main stats

WeaponATKFixed
HelmetHPFixed
ShieldDEFFixed
GauntletsHP% or DEF%Survivability
ChestplateHP% or DEF%Survivability
BootsSPDAlways - turns win fights
RingHP or DEFFlat survivability
AmuletHP or DEFFlat survivability
BannerRESResists enemy debuffs

Masteries

The key pick in each tier of the two trees - hover or tap a mastery for the game's own text. How masteries work

Defense

  1. T1Tough SkinDEF.
  2. T2BlastproofLess AoE damage taken.
  3. T3ResurgentCan shake off a debuff after a big hit.
  4. T4Delay DeathTakes less damage from the same enemy over time.
  5. T5Selfless DefenderTakes part of an ally's first hit each round.
  6. T6BulwarkTakes 5% of the team's damage for them.

Support

  1. T1SteadfastMAX HP.
  2. T2Lay On HandsStronger heals.
  3. T3Rapid ResponseTurn meter when its buffs expire.
  4. T4Lore of SteelStronger set bonuses.
  5. T5Lasting GiftsIts buffs can last a turn longer.
  6. T6Elixir of Life+3,000 MAX HP.

Blessings

  • Polymorph - A deterrent against enemy debuffers - best in the Arena and against ordinary enemies, not bosses.
  • Temporal Chains - Speed control for the whole team: slower enemies act less often, which is why it is a staple for support and control champions.
  • Lightning Cage - Rewards teams that fight buffed enemies and gives any attacker a steady source of extra damage.

How blessings work

Relics

  • Blades of Akumori - When an ally is attacked, it may [Provoke] the attacker - useful against enemies that can be provoked.
  • Volcardiac Heart - Puts a protective buff on the whole team as the fight opens, which helps most when the first rounds are the dangerous ones.
  • Immortal Visage - A built-in second life once per round: it keeps a key champion in the fight long enough for its kit to matter.

How relics work

Arena

Stat priority

  1. HP% - Bigger HP pool to soak hits for the team.
  2. DEF% - Every point of DEF cuts the damage taken.
  3. SPD - Protection, taunts and buffs only help if they come in time.
  4. RES - Shrugs off enemy debuffs and crowd control.
  5. ACC - Optional - only the A1 places [Sleep], so other stats come first.

Gear set combinations

Main stats

WeaponATKFixed
HelmetHPFixed
ShieldDEFFixed
GauntletsHP% or DEF%Survivability
ChestplateHP% or DEF%Survivability
BootsSPDAlways - turns win fights
RingHP or DEFFlat survivability
AmuletHP or DEFFlat survivability
BannerRESResists enemy debuffs

Masteries

The key pick in each tier of the two trees - hover or tap a mastery for the game's own text. How masteries work

Defense

  1. T1Tough SkinDEF.
  2. T2BlastproofLess AoE damage taken.
  3. T3ResurgentCan shake off a debuff after a big hit.
  4. T4StubbornnessMore RES while debuffed.
  5. T5RetributionCounterattacks after a big hit.
  6. T6Unshakeable+50 RES.

Support

  1. T1SteadfastMAX HP.
  2. T2Lay On HandsStronger heals.
  3. T3Rapid ResponseTurn meter when its buffs expire.
  4. T4Lore of SteelStronger set bonuses.
  5. T5Lasting GiftsIts buffs can last a turn longer.
  6. T6Elixir of Life+3,000 MAX HP.

Blessings

  • Polymorph - A deterrent against enemy debuffers - best in the Arena and against ordinary enemies, not bosses.
  • Temporal Chains - Speed control for the whole team: slower enemies act less often, which is why it is a staple for support and control champions.
  • Lightning Cage - Rewards teams that fight buffed enemies and gives any attacker a steady source of extra damage.

How blessings work

Relics

  • Blades of Akumori - When an ally is attacked, it may [Provoke] the attacker - useful against enemies that can be provoked.
  • Volcardiac Heart - Puts a protective buff on the whole team as the fight opens, which helps most when the first rounds are the dangerous ones.
  • Immortal Visage - A built-in second life once per round: it keeps a key champion in the fight long enough for its kit to matter.

How relics work

More from Undead Hordes

See all →